
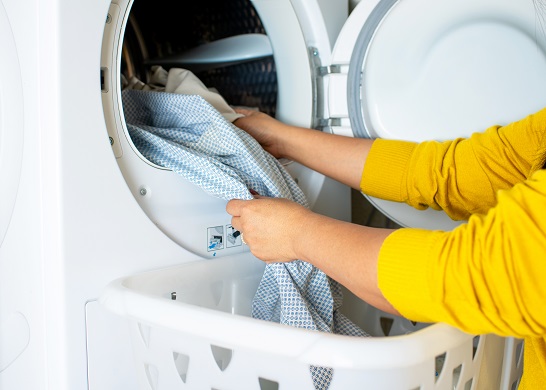
So you’ve got a new tumble dryer and you want to install it yourself. That’s great – you can save money and get it done whenever you like. In this guide we’ll explain how to install a tumble dryer safely.
Before you start, it’s worth knowing the differences between condenser and vented dryers. The condenser type are easy to install, but for a vented dryer you’ll need some DIY skill.
Safety first
Tumble dryers are big and heavy – so make sure you can handle it without hurting yourself. Always have another adult nearby to help, and be sure to:
- Lift and move the tumble dryer with care to avoid injury
- Use gloves with good hand protection and grip
- Wear steel-toed boots to protect your feet
How to install a vented dryer
Vented dryers push the damp air outside through a vent in the wall. So if there isn’t already a vent opening, you’ll have to drill through the wall. Make sure you can do this safely, using a suitable drill and masonry bit. If you’re not confident with this level of DIY, please get a professional to help.
1. Check the installation location
A vented dryer needs to be near an external wall or window – so the hose can reach outside. You’ll also need a power outlet and enough space for the dryer itself.
Start by deciding where to put the vent. Next, make sure there are no cables or pipes in the wall there. Then measure the dryer’s hose and find a spot for the dryer within that distance of the vent. Check the measurements of the dryer against the space you want it to fit in.
2. Install the tumble dryer vent
The end of the vent (at the wall) should always be level or pointing downwards. This stops condensation running down the vent and back into the dryer. The end of the vent usually needs to be a certain height off the ground as well. Check your user manual to find the specifics for your dryer.
You’ll need:
- A pencil
- A drill with a masonry bit
- Silicone sealant
- The vent and faceplate that came with the dryer
If the wall already has a hole for the vent, you can skip to step 4. (Or go to step 7, if there’s a grille on the outside wall as well).
- Hold the end of the hose up to the wall (where you want the vent) and mark around it with the pencil
- Drill around the pencil line and connect those holes with the drill, to create a circular opening for the vent
- If it’s a cavity wall, repeat step 2 on the outside wall (so the two circular openings line up)
- Put the vent grille on the outside wall and mark the screw holes
- Drill into the wall for the screw holes
- Fill the screw holes with silicone caulk and put wall plugs into the caulk before it sets
- Push the flexible vent tube through the hole from the inside and screw the vent grille into the outside wall
3. Move the dryer into place
If possible, get someone else to help you move the dryer. You can also buy appliance rollers quite cheaply, to wheel the dryer to its location.
Before moving it, make sure the hoses and cables are wrapped or tied out of the way. And check that the path in front of you is clear of any obstacles or breakables.
Once the dryer’s in place, put a spirit level on top and make sure it’s stable. If needed, you can usually turn the feet clockwise to raise – and anticlockwise to lower.
4. Switch the power on and check it’s working
Finally, turn the dryer on and check the display and controls are working. This is also a good time to look at the user manual. You might also enjoy our guide to tumble dryer symbols and what they mean.
If you have a few things to dry, have a go at finding the right settings for them. Then give it a test spin, so you can check the dryer is installed properly.
How to install a condenser dryer
A condenser dryer doesn’t have a hose to the outside. So it’s easier to install than a vented dryer and doesn’t need an external wall. Just make sure there’s a power outlet nearby and enough space to fit the dryer in.

1. Find the right spot
Find a spot with good ventilation and enough space for the dryer. Near a window is ideal – avoid small spaces like cupboards. You’ll also need a plug point close enough for the dryer’s cable to reach. It’s not recommended to plug in an extension lead because tumble dryers use a lot of power.
2. Move the dryer
Check all cables are out of the way and the path is clear. You can use appliance rollers to move the dryer without straining yourself or scratching the floor. Get another adult to help with lifting.
3. Give it a test
Wipe the inside of the drum down to get rid of any dust. You can use a cloth with some white vinegar. Then plug it in and check the controls are working. Have a look at the user manual to understand the settings. Lastly, give it a test run.
Keep your tumble dryer running smoothly
Once your tumble dryer’s installed, you’ll wonder how you ever lived without it. But what if it gets damaged or breaks down? We can cover your dryer for accidental damage right away. And we’ll also cover breakdowns after the manufacturer’s guarantee ends. So you can avoid the surprise costs and hassle of repair bills.
Our blog is loaded with more related articles

Tumble dryer tips
Cost of running a tumble dryer
In the rainy UK, we can’t hang laundry outside for much of the year. So perhaps you’re looking at tumble dryers and...
Read more

Tumble dryer tips
How to use a tumble dryer correctly
Tumble dryers are great if you want your clothes ready to wear in a jiffy. They make life simpler, saving us from hanging cloth...
Read more
Tumble dryer tips
Tumble dryer buying guide: what to look for in a new dryer
Looking for a new tumble dryer but feeling overwhelmed by the options? Our buying guide covers everything from capacity to ener...
Read more