Need to balance your radiators, but not sure where to start?
First off, you don’t need a spirit level. It actually involves adjusting the flow of hot water across your central heating system – so all your radiators heat up at the same speed.
The balancing process can take up to a day, depending on how many radiators you have around your home. From a technical perspective, it’s fairly easy to do if you’re comfortable with DIY. But if you haven’t quite got the patience, you can always call a plumber or a heating engineer.
Top tip – before you attempt to balance them, it’s best to bleed your radiators to see if that fixes any issues.
How to tell if you need to balance your radiators

It’s a good idea to balance your radiators at least one a year. And it’s best to do it at the start of winter.
More generally, there are a few tell-tale signs that might mean your radiators need balancing.
Make sure your heating’s turned on, then check your radiators for cold spots. See whether some are heating up faster than others. You might notice, over time, that certain rooms in your home are colder than usual (even when the heating’s turned up).
You should also balance your heating system after:
- Removing or replacing any radiators
- Changing radiator valves
- Making alterations to the heating system
- Flushing the system
- Replacing your boiler or central heating pump
Understanding your radiator valves
When it comes to radiator DIY, you need to know your valves. Here’s a quick summary of the three main types:
Manual valve
If you live in an older property, you’ll probably recognise this one. It’s the original type of radiator valve, with a plain, round metal top – which you can just twist on or off to let the water flow in.
Thermostatic radiator valve (TRV)
Most homes with newer heating systems have TRVs on their radiators – instead of the old manual valves. TRVs have numbers on. You can use the dial to turn the water on or off and set the temperature of your radiator. (TRVs also tend to be much bigger than manual valves.)
Lockshield valve
This is usually the smallest valve on a radiator – and you’ll find it on the outlet. Most lockshields are covered by a plastic hood with a screw through the top. The valve itself (underneath the hood) looks like the tip of a flat-head screwdriver.
How to balance your radiators
Here’s your step-by-step guide to balancing the radiators in your home.
Before you get started, you’ll need these tools:
- Screwdriver
- Adjustable spanner or lockshield valve key
- Digital thermometer or multi-meter with thermometer
Make sure you have a pen and paper (or your mobile) handy too, as you’ll need to make some notes. In fact, it’s a good idea to write a list of all your radiators upfront – so you don’t miss any out.
And remember, if you haven’t done it recently, it’s best to bleed your radiators before balancing them.
As always, take care with hot water, heating systems and gas appliances. Stay safe, and if in doubt, contact a professional.
1. Switch your heating off
First things first. Turn off your central heating and wait for your radiators to cool down. They need to be completely cold before you move onto Step 2. (Time for a cuppa already.)
2. Open both valves on every radiator
Once they’ve cooled down properly, work your way round every radiator – opening each valve on either side. Be sure to turn the valves anti-clockwise.
For lockshield valves, you’ll need to remove the plastic hood (using a screwdriver in some cases). Then, twist the metal valve underneath with an adjustable spanner – or a lockshield valve adjuster if you have one.
You can just twist manual valves and TRVs by hand.
3. Check how fast each radiator heats up
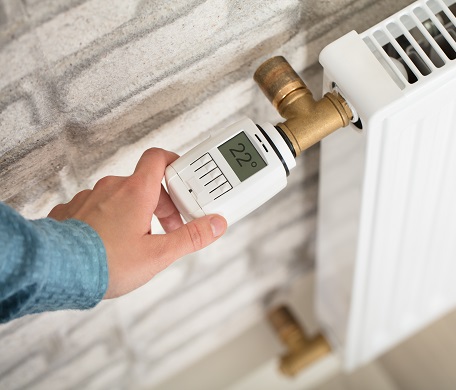
Now it’s time to turn the heating back on – and get some steps in.
Working through your list, you need to jot down the order in which your radiators warm up. (This info is super important.) Be sure to record which one heats up the fastest.
Bear in mind, you might need a hand from someone else if you live in a big house – unless you’re happy to work up a sweat.
4. Allow your radiators to cool then restart your heating
Now you need to turn the heating off (again). Wait for all your radiators to completely cool down (again). Then turn your heating back on (again).
It might feel like groundhog day, but keep going… The end is in sight. (Or you could still bow out and call a plumber.)
5. Take temperature readings for the fastest-heating radiator
Check your list and go to the radiator that was fastest to heat up.
Close the lockshield valve using your spanner or lockshield key.
Open the lockshield valve again by a quarter-turn.
When the radiator’s hot, check the temperature where the pipework meets the wall or floor – on the lockshield side. Note down this reading.
Now check the temperature of the pipework on the other side, near the TRV or manual valve. Note down this reading, too.
Slowly open the lockshield valve until there’s a temperature difference of 12oC between the two valves. (You’ll need to wait a few minutes after each valve adjustment, so the temperature can change.)
6. Eat, sleep, radiator, repeat
If you’ve made it this far, give yourself a pat on the back. And get ready to repeat Step 5 for the rest of your radiators.
You’ll need to do this in the order they heated up. So follow your list – from fastest to slowest.
Don’t forget, you’re aiming for a temperature difference of 12oC between the two valves on every radiator.
As you work your way round, you should notice the amount that each lockshield valve needs to turn relates to the distance between each radiator and your boiler. When you get to the last one, you’ll probably need to open the valve completely.
And… that’s it.
You should now be able to sit back and enjoy your perfectly-balanced heating system.
Still having problems with your heating?
If you’ve followed all these steps and you’re still having issues, it’s probably time to call in the professionals.
Remember, a plumber can carry out ‘wet work’, like changing radiators and installing water pipes. But any work on a gas boiler must be carried out by a Gas Safe registered engineer.
Our blog is loaded with more related articles

Plumbing and heating tips
Easy plumbing maintenance tips
Did you know that the earliest copper piping dates from an Egyptian pyramid built 4,500 years ago? Since plumbing has been arou...
Read more

Plumbing and heating tips
Heating not coming on? There could be a simple fix...
It’s that time of year again, one of the busiest for heating engineers, when people start to turn their heating on after...
Read more
Plumbing and heating tips
How to keep your house warm in winter
From checking your thermostat to insulating your roof, here's our top tips to keeping your home warm in winter.
Read more
